


Policy - Zurich Connector
Welcome to the developer homepage of the Zurich API Connector - Policy API.
Via the B2B Policy API, our corporate customers and their authorized parties can access the policy information and values for life and non-life risk portfolios with Zurich.
This API documentation will help business application owners and their development teams get started using the Policy API and exchanging data in as short a time as possible.
The sections of this guide are broken down as follows:
- Getting Started: A brief overview of the steps to getting authenticated and retrieving data from our API.
- Authentication: Guides you through how to authenticate yourself and manage your API credentials in MyZurich.
- Using the Swagger: How to make use of our interactive API interface on Swagger.
- Assigning Delegates: Guide for Administrators on how to add delegates to maintain the API credentials on their behalf, as well as an overview of the credential expiry process.
- Versioning: How we make use of semantic versioning to monitor API changes.
- API Console: How to obtain a sample response in just a few clicks, directly via this API Console.
For further information about the Zurich Connector API, please visit the Zurich Insurance webpage: https://www.zurich.com/en/products-and-services/protect-your-business/zurich-international-programs/tools/zurich-api-connector-solution
If you have any questions or concerns, please contact this mailbox: myzurich@zurich.com

Obtaining Access
Step 1. Obtaining API Credentials
If you haven't already been provided credentials to access the API, you will need to first request these by contacting this mailbox: myzurich@zurich.com
In your e-mail, please use the subject header "Request for New API User", specify that it's the Policy API endpoint you would like to get access to, as well as the name of your organisation, and the purpose for wanting to use our API. A member of our team will then reach out to discuss this with you further.
Step 2. Connecting to the API
Once registered for API access, you will receive a client ID, client secret, and a pair of subscription keys. The client secret and subscription keys must be kept confidential.
To get an access token, make a POST call to the authentication endpoint (https://uat.myzurich.com/login/connect/token) using the client id, client secret and either the primary or secondary subscription key obtained earlier. The scope should include the MyZurich.Api as well as the MyZurich.Api.PolicyPortfolio.
The response should return the access token which you will need to call the API in the next step.
For an example of this step using Postman, please see the Authentication section.
Step 3. Accessing the API Endpoint
In order to access the API endpoint you need to provide the bearer access token you previously obtained within the request to the API.
With a valid access token you can now request data from the Policy API, by making a request to this endpoint: https://ci-gf-open-api-uat.zurich.com/open/myz-api/policyportfolio. For more information about the Policy API data model please see the "Specification" section, or alternatively our dedicated Swagger Page: https://uat.myzurich.com/myz-api/policyportfolio/docs/swagger/
Overview
The Policy API accepts HTTPS/TLS connections only in order to protect the integrity and confidentiality of any data transferred. HTTP connections are refused - plaintext communication is not supported.
As a further means to secure requests, this API, by default, uses OAuth 2.0 Client Credentials Flow:
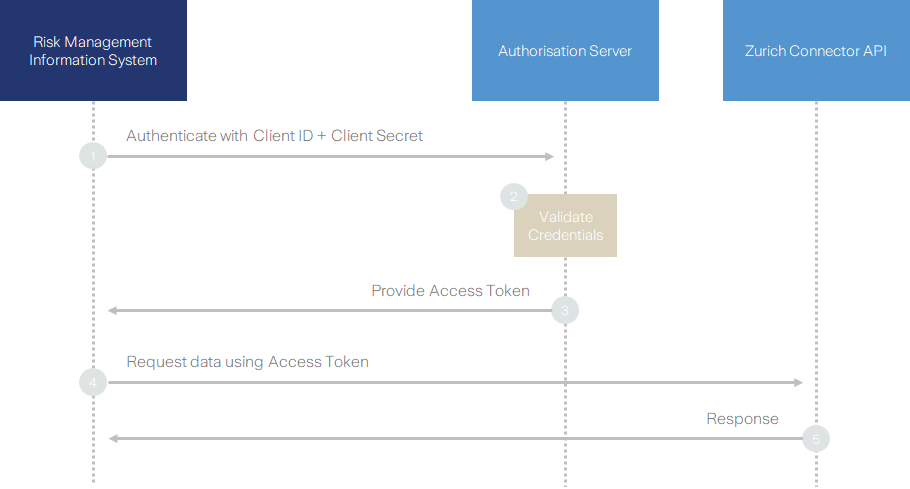
Client ID/Secret using Basic Authentication Header
Follow the pre-requisites steps found in the Getting Started section to obtain your credentials.
Once you have access to the client_id and client_secret, pass the values in the Authorization header with the type Basic to make requests on behalf of a user:
Basic client_id:client_secretThe client_id:client_secret value must be a base64-encoded string.
In case of an invalid token, a 401 HTTP Status Code with code authentication_error will be returned.
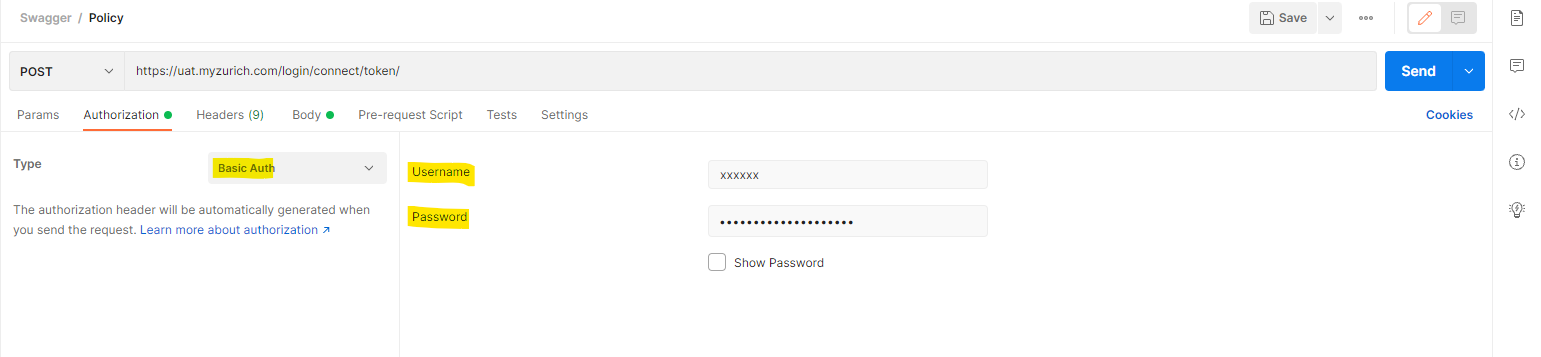
Step-by-step example using Postman:
1) Open Postman application
2) Open new tab with POST method
3) Click on “Authorization” tab >> Paste URL link with appropriate environment (For example: https://uat.myzurich.zurich.com/login/connect/token/)
4) Select type = Basic Auth
5) Fill «Username» (Client ID) and «Password» (Secret) fields according to environment
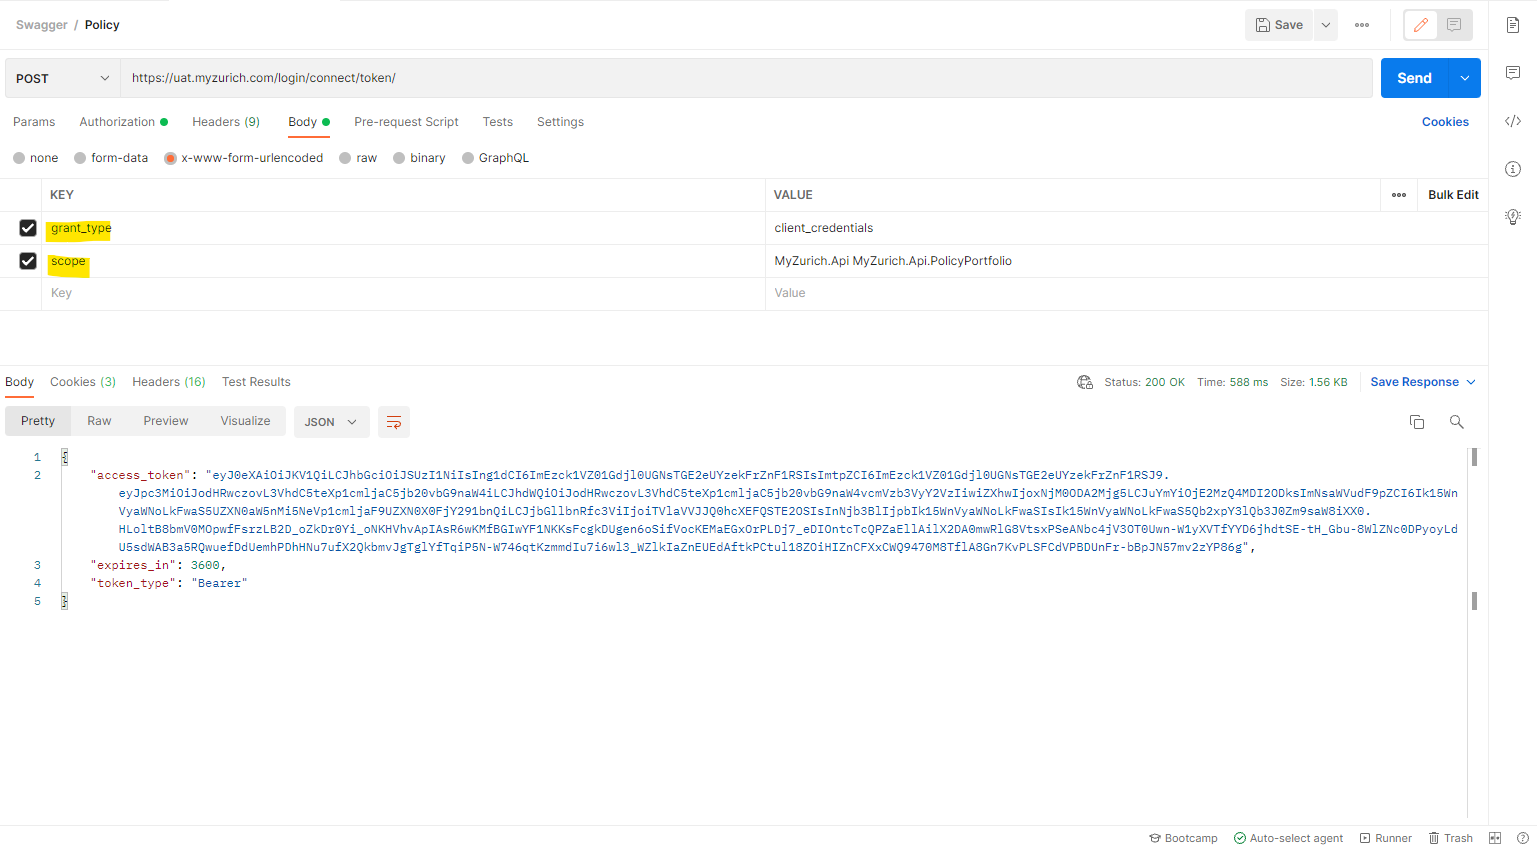
6) Click on “Body” tab
7) Add a few parameters: “Grant Type” and “Scope”
8) Click “Send” >> User will see created Token in «Body» section
Making a Request to the API
Now that you have the Access Token, you can now call the API to receive a response.
1) First, specify the URL and method (e.g. "GET") of the API you would like to call. For the Policy API UAT, the URL is https://ci-gf-open-api-uat.zurich.com/open/myz-api/policyportfolio.

2) Next, add the Access Token you received in the "Authorization" Tab, as well as the relevant Subscription Key (either primary or secondary one will work) under the header "Ocp-Apim-Subscription-Key".
3) Click "Send".
If all the details were correct, you should receive a 200 status code, with the expected response from the API.
Accessing & Managing API Credentials
You can view and manage your API credentials and subscription keys in the MyZurich API Portal.
Viewing/ editing your API Credentials on the MyZurich platform:
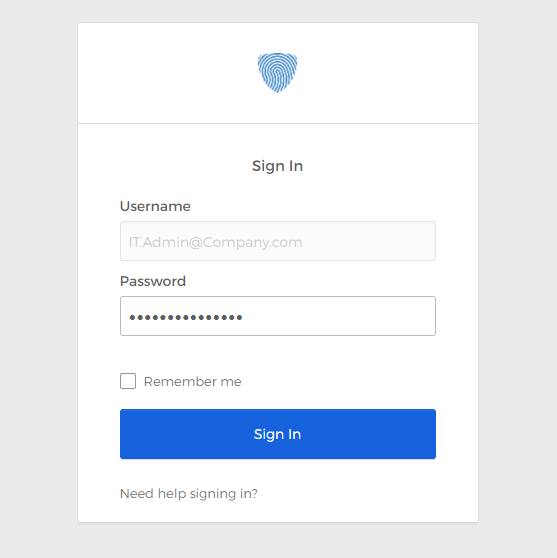
1) Visit MyZurich and complete the Login process.
2) From the Settings menu, click Account administration.
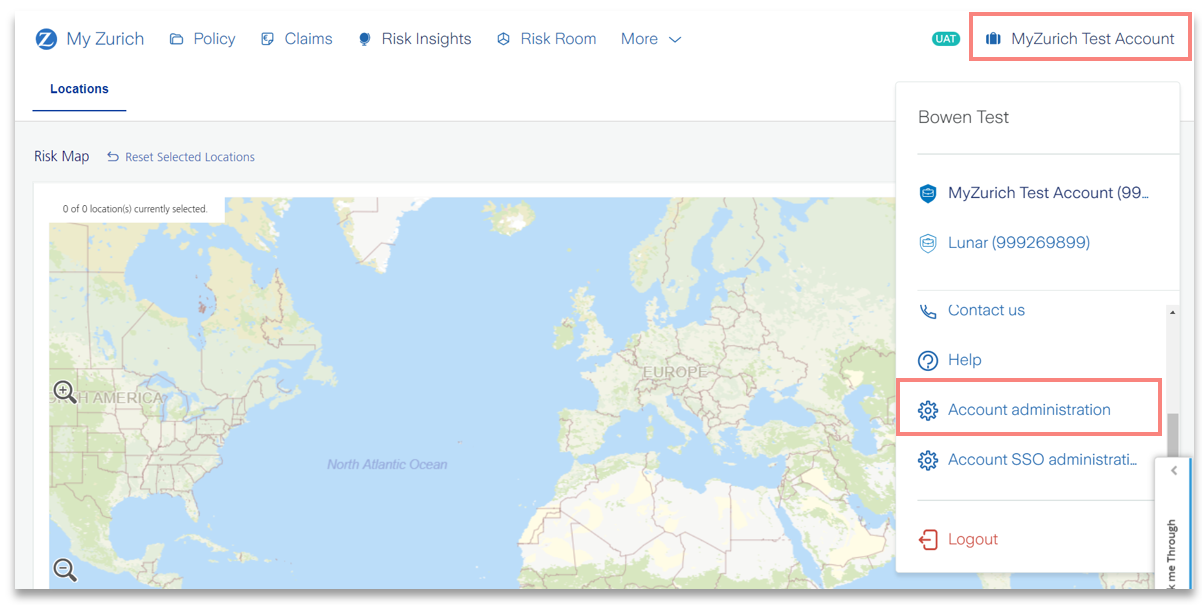
3) Click on the API tab.

Note: As an 'IT Administrator' user type you will directly land on the API Tab
4) In the API tab, click on the button VIEW/EDIT SECRET.
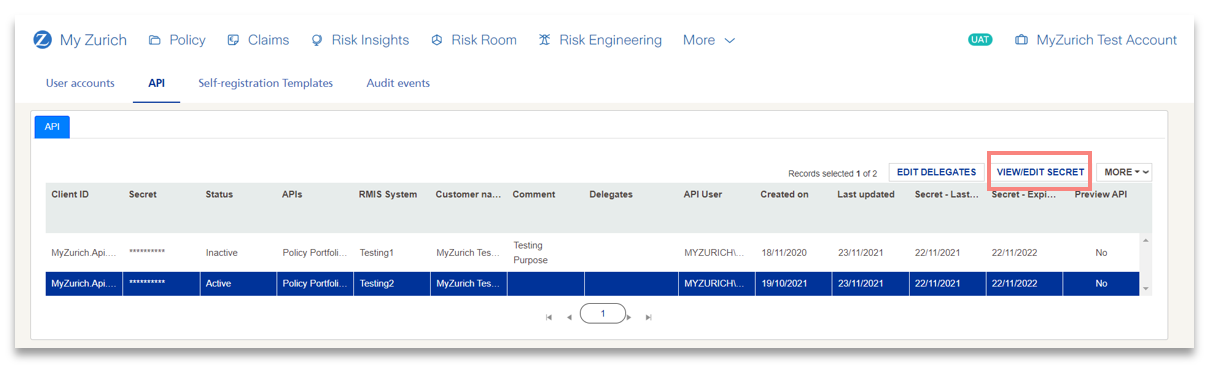
5) Here you can view the current secret but also change by either entering manually a new secret or click on the button GENERATE for the automatic Secret generation.
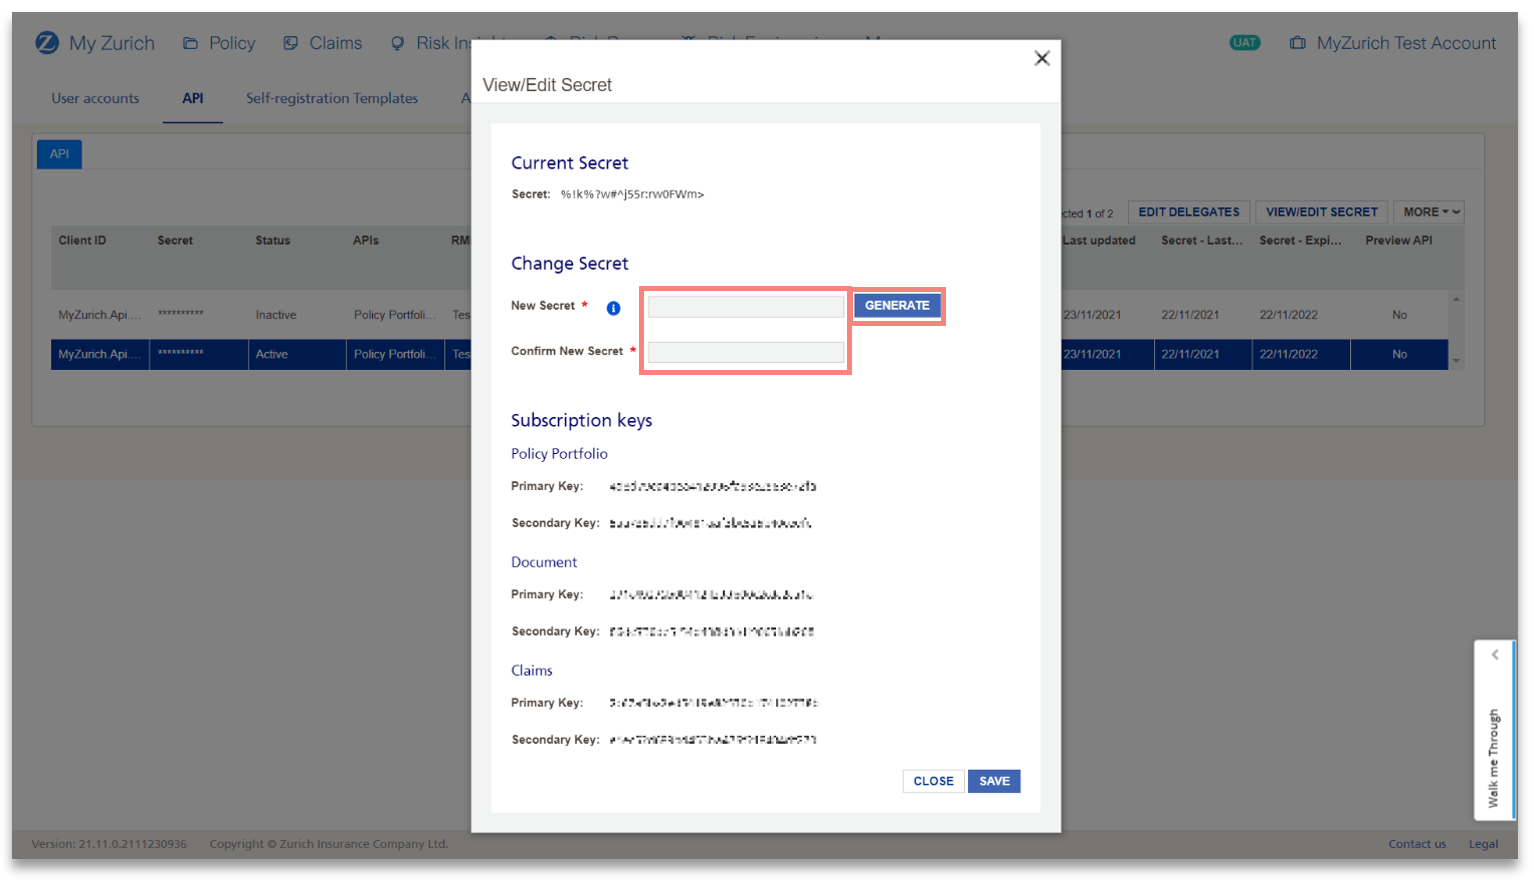
Note:
- If you click on the "i" next to the New Secret, the password requirements are listed.
- This screen also displays your subscription keys. Both the Primary or Secondary key can be used to call the API, with one key pair provided per API scope. Depending on if you have multiple API scopes enabled, you may have more than one key pair.
6) Once the new secret is entered, click on SAVE.
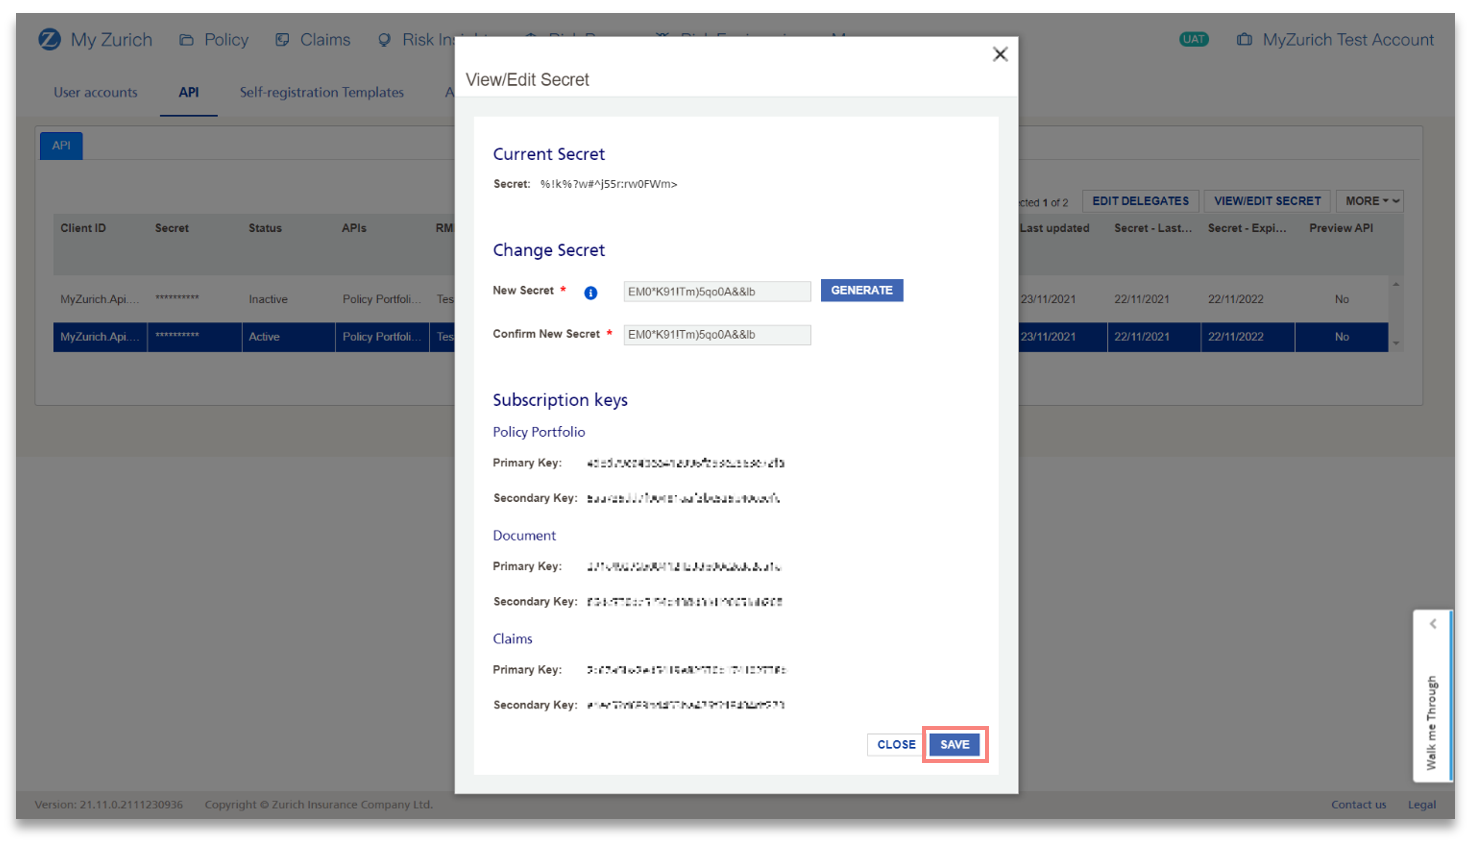
Note: You can still change an automatically generated secret.
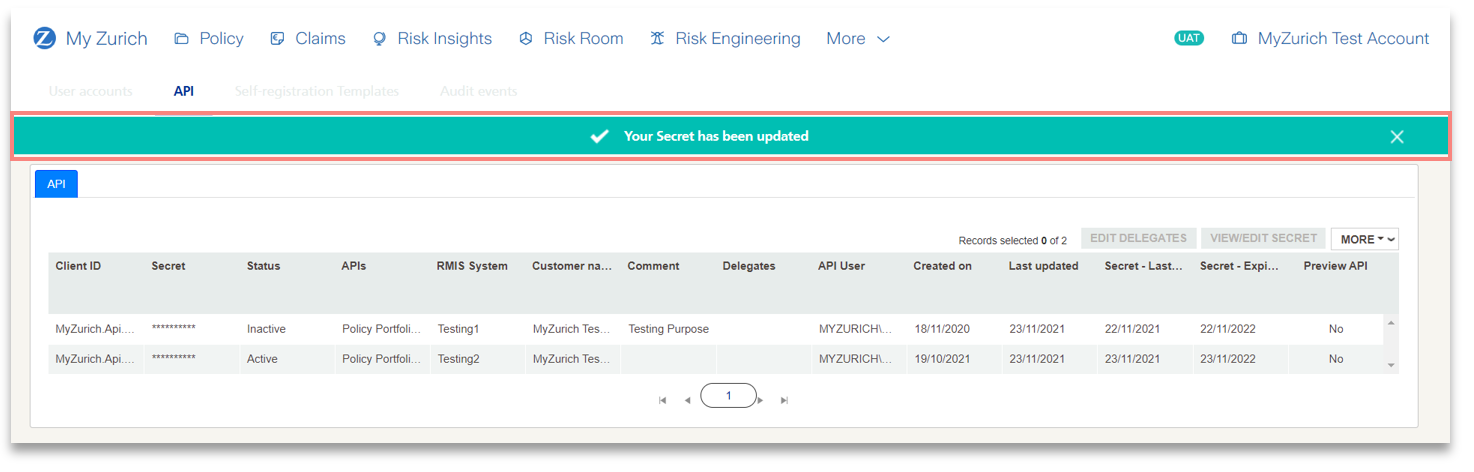
7) The Secret has been successfully updated.
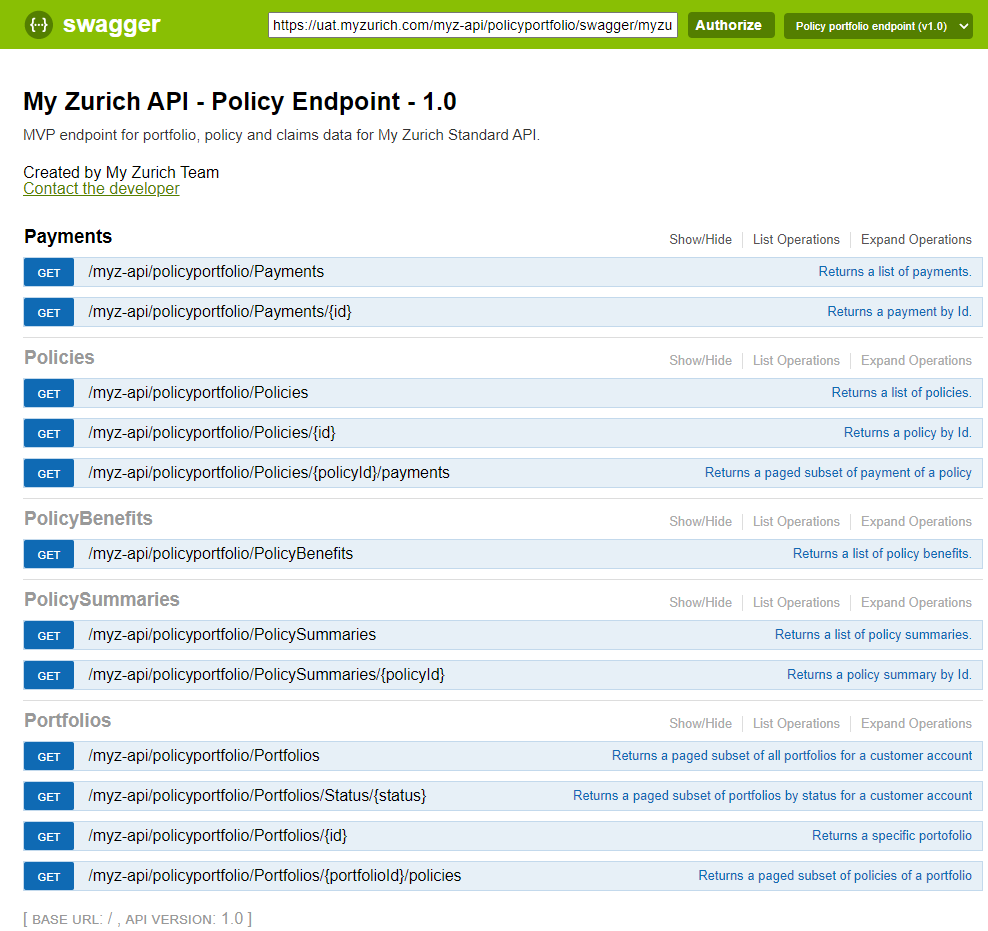
Alongside this API Catalog, we also document our APIs on Swagger, which provides the JSON Schema as well as an interface by which you can directly call our API and get a response in the form of an interactive UI.
You can find the link to our Policy API Swagger Documentation here:
Production Environment: https://www2.myzurich.com/myz-api/policyportfolio/docs/swagger/
UAT Environment: https://uat.myzurich.com/myz-api/policyportfolio/docs/swagger/
Step-by-Step Guide on Using the Swagger:
Authentication
1) The links above should take you to the main Policy API Swagger page:
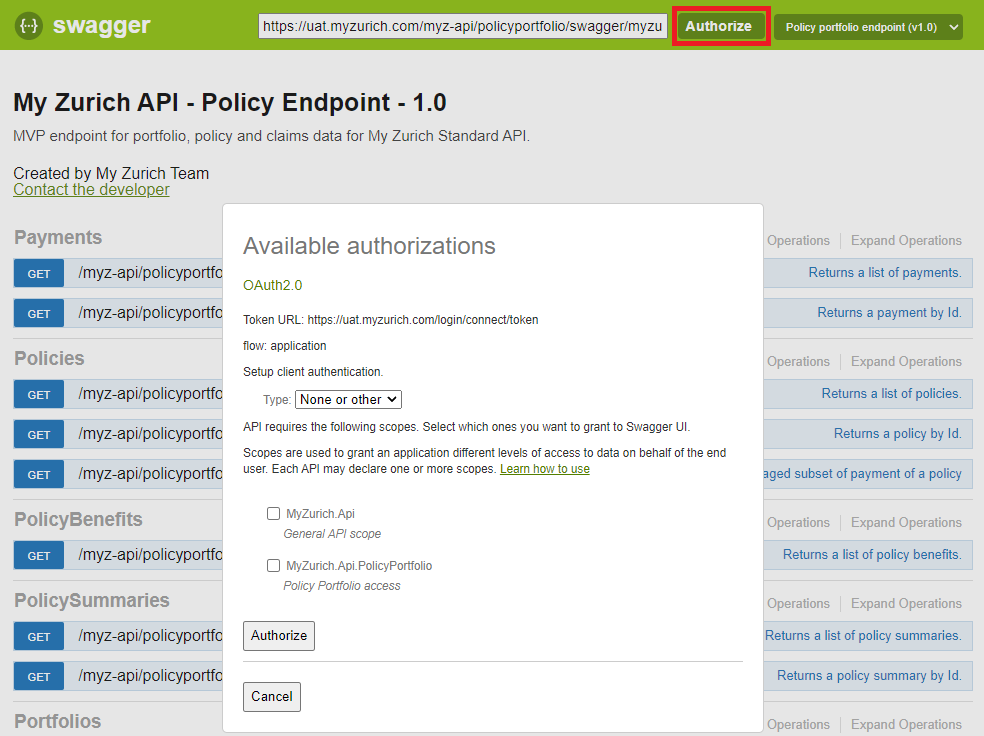
2) To call our API, first authorise by clicking on the "Authorize" button:
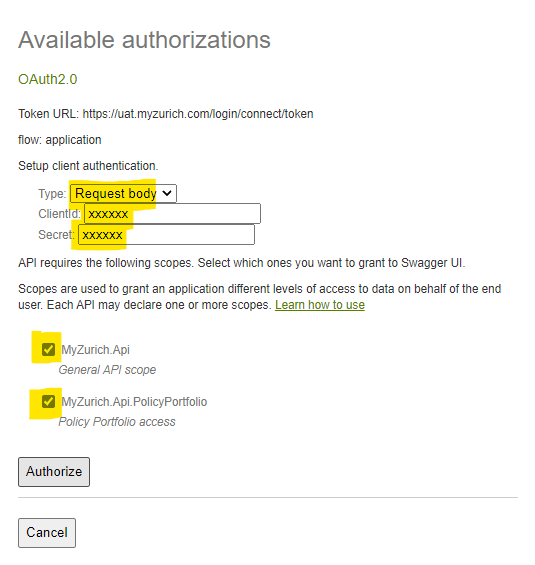
3) In the pop-up window select Type: "Request Body", fill in your ClientId and Secret for that environment, and select both scopes. Finally, press Authorise.
4) Check that your authorisation was successful, but expanding one of the GET methods, and ensuring the blue "i" appears:
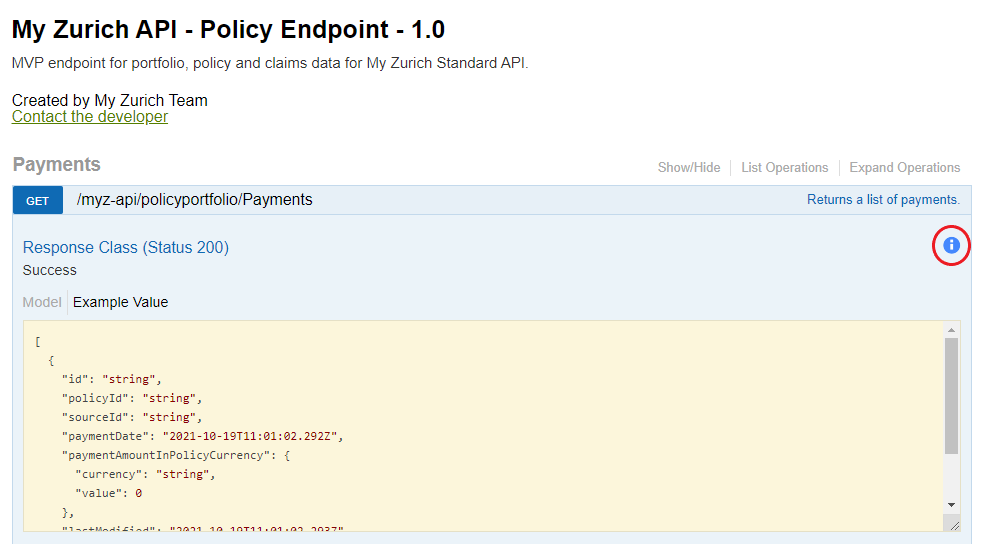
Note: If authentication was not successful, you would see a red exclamation mark. For instructions on how to view or edit your credentials please see the "Authentication" section.
Getting a Response from the API
5) Once authenticated, expand one of the methods e.g. [GET] or [Put]. Here for example: Policyportfolio/Payments.
6) Add in any required parameters, e.g. you can add a modifiedSince date to retrieve a subset of Payments. Or alternatively, leave the parameters blank to pull up all Payments.
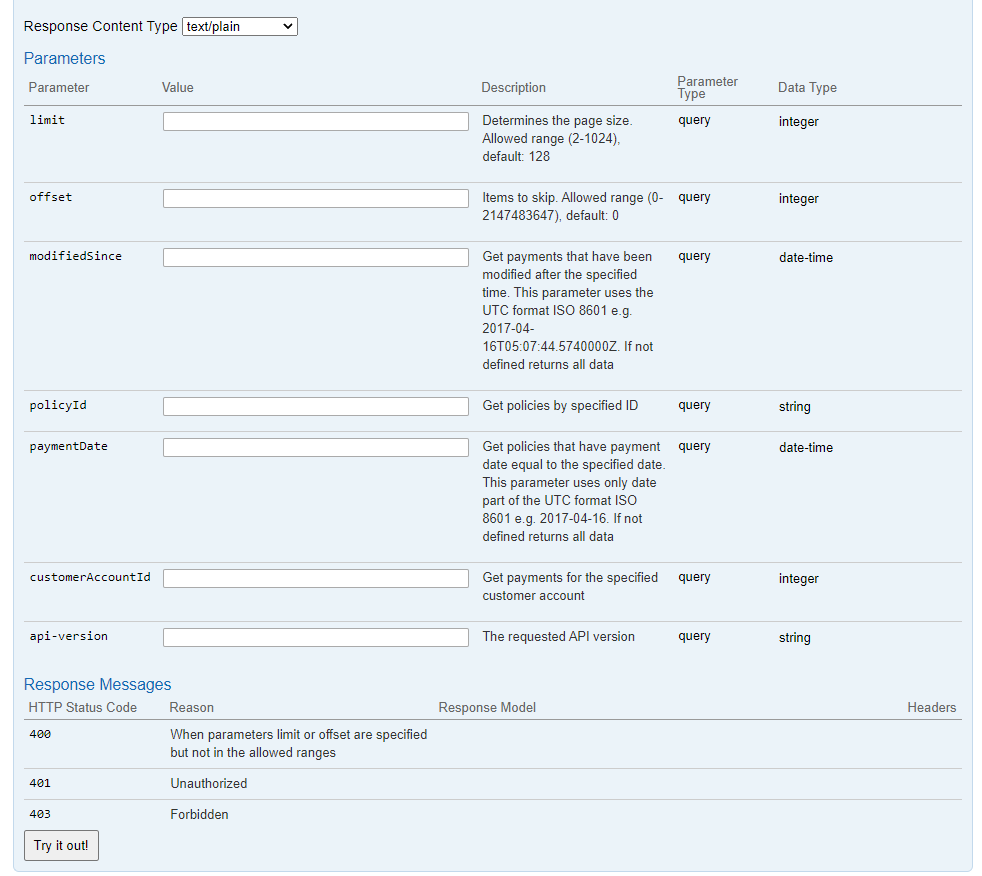
Important: In case you are pulling a large number of policies, the default limit per call is 128. By populating the "limit" parameter, you can extend the range up to 1024. If the dataset required is larger than this, this would require multiple calls, and making use of the "offset" functionality in subsequent calls to capture all data.
7) Click on "Try it Out!", and you should receive the desired response based on the parameters set.
For compliance reasons, API passwords (these are known as secrets in the system) are required to be reset at least on an annual basis. Therefore, we notify users via e-mail 2 months before their API secret(s) is due to expire.
Only users with the roles ‘Administrator’ and ‘IT Administrator’ will receive this notification e-mail and have the permissions to view/edit/reset API secrets.
Administrators will have the ability to create a new user with the role ‘IT Administrator’ and assign them as a ‘delegate’ to an existing API. Whereas Administrators will be able to edit secrets for any API related to a customer, IT Admins will only have permissions to gain visibility of and edit the secrets for the API clients that they are assigned to.
To enable this, we have an API portal section which the above roles can use to view and edit secrets for the APIs they are responsible for, as well as where Administrators can edit delegates.
This guide focuses on how Administrators can add delegates to an API. These delegates, or IT Admins, can view and manage API credentials within MyZurich, on behalf of the Administrators.
For instructions on how to view and edit your API credentials, please see the "Authentication" section.
Assigning API Delegates as an Administrator
Step 1) Accessing the API Management section in MyZurich
1) First, log in to MyZurich.
2) Within the portal, go to Settings (Top Right Corner) → Account Administration.

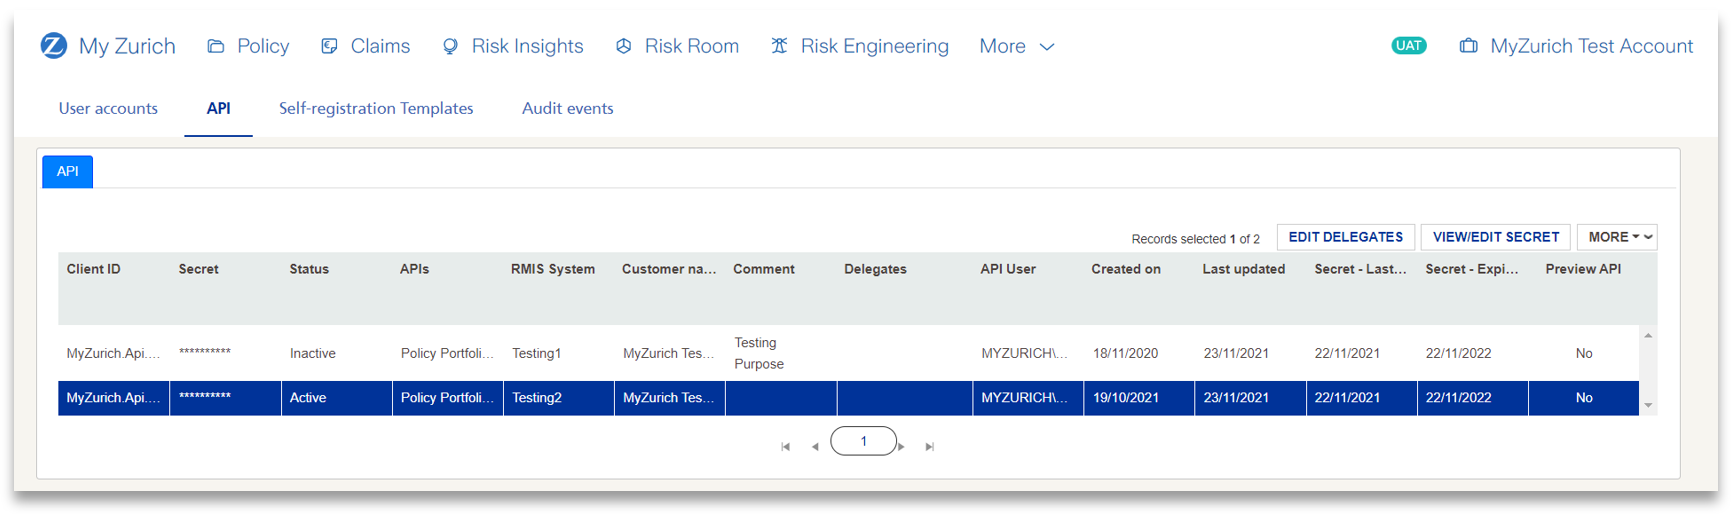
3) Click on the API tab.

4) You should see a list of APIs that you are responsible for.
Step 2) Assigning IT Administrator Delegates:
Once you have created/ assigned a user with the new IT Administrator role, in the API section you may:
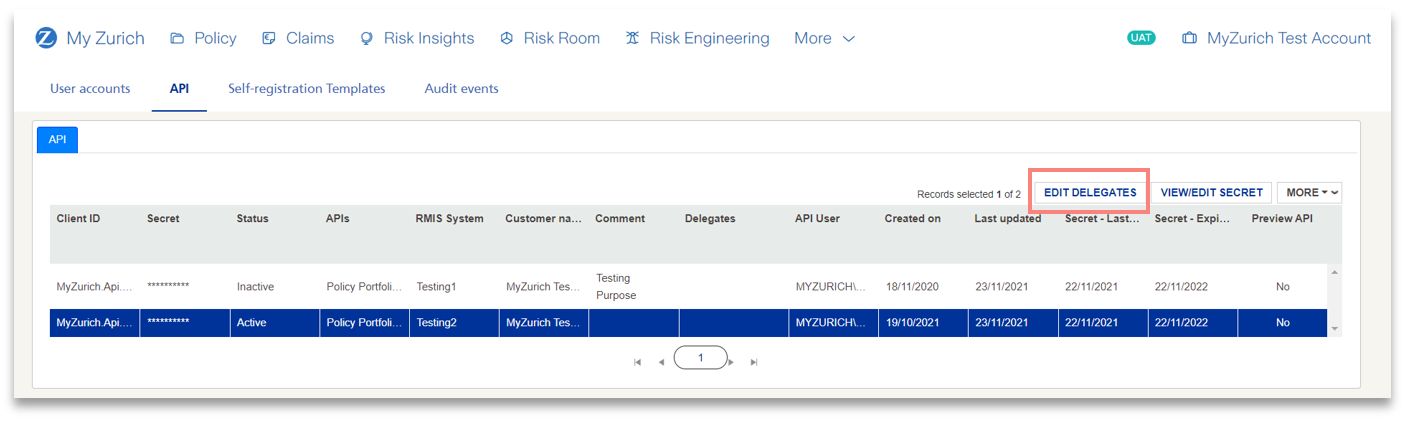
1) Select the relevant Client ID which you wish to assign a delegate.
2) Press the EDIT DELEGATES button.
3) In the Users dropdown, select the IT Admin user(s) you would like to assign as a delegate and click Add button.
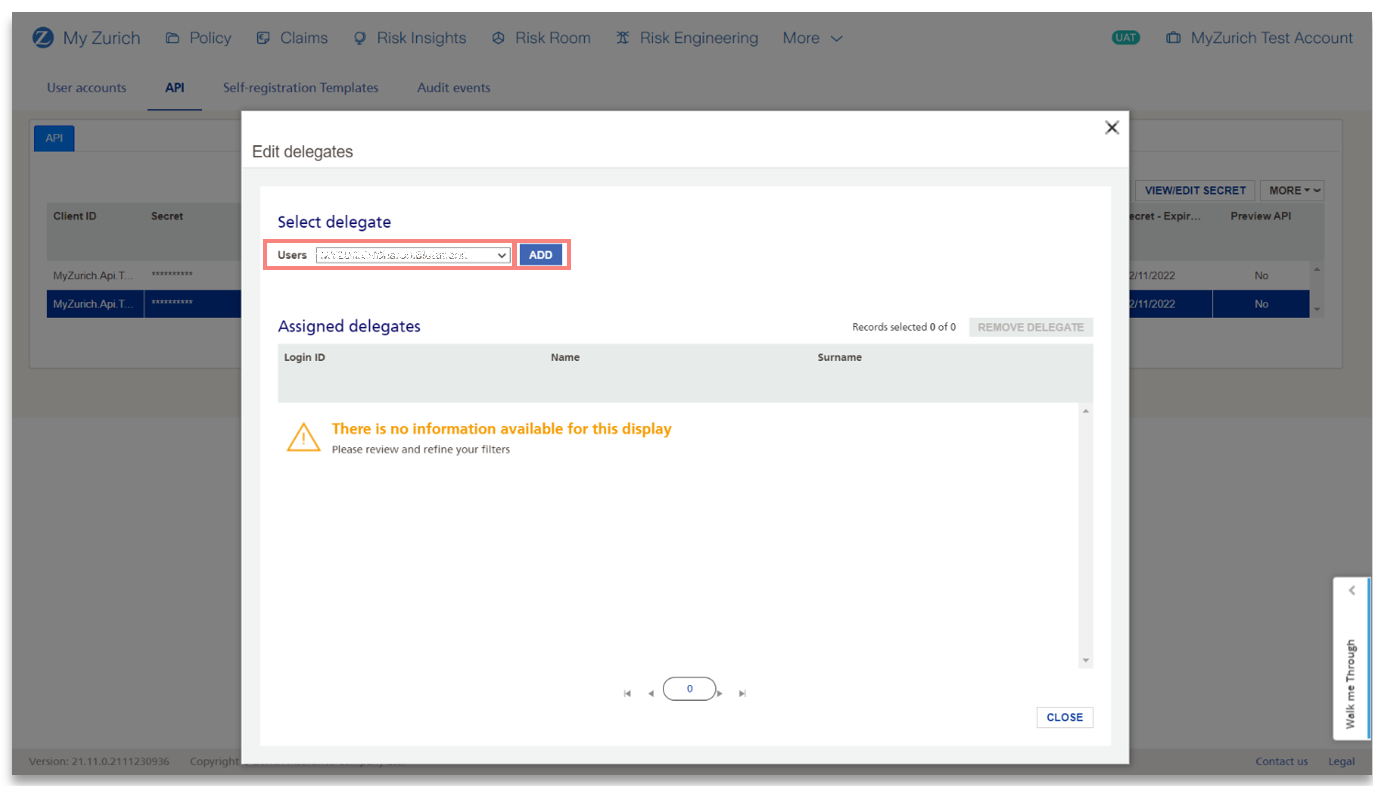
Note: In the Users dropdown, only users with IT Administrator user type will be displayed.
4) When you have added all relevant delegates for that API Client, click on Close button.
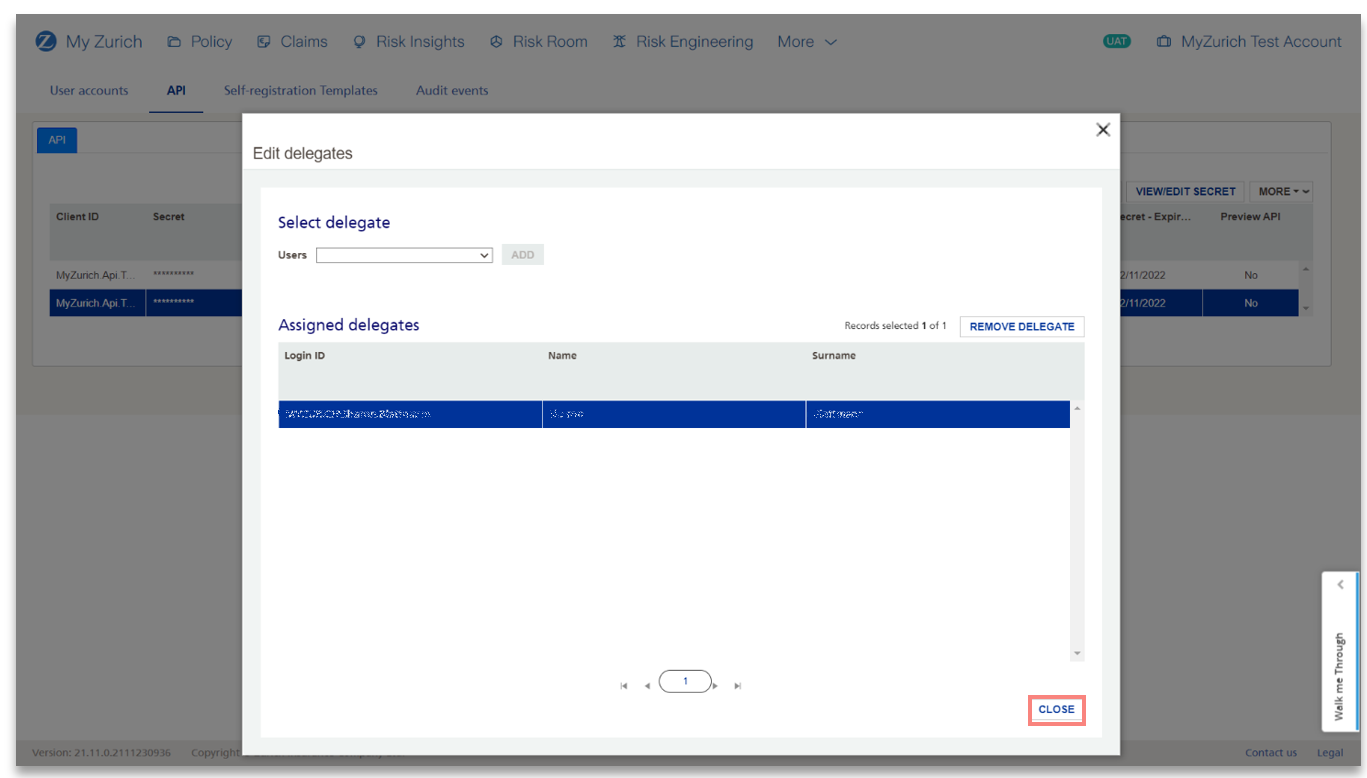
5) You can view the Assigned Delegates in the respective column.
Note: If you would like to change the secret yourself, simply click on the relevant API client, and press the VIEW/ EDIT SECRET to edit it. Additionally, you may also remove delegates by selecting the user within Assigned Delegates and selecting Remove delegates button.
Additionally, if an Administrator/ IT Administrator is assigned to the customer account/ Client ID within two months of the expiry date, they will not receive a notification e-mail.
API Secrets will remain valid for 1 year after creation / modification.
The Zurich Connector API team are committed to continuously improving and expanding the services it provides its customers. All APIs developed by the group follow the Semantic Versioning specification.
Where possible, the team will make changes to the API but not change the version number because the changes are not considered to be backward compatible. Such changes can be any of the following:
- Addition of new resources.
- Addition of new non-mandatory request parameters of attributes.
- Addition of new data fields returned in the response.
- Change in the order of data fields returned by the API.
There might be some instances in which breaking enhancements need to happen. In such circumstances, a new version is released not to break compatibility. Such enhancements include:
- Inclusion or removal of mandatory parameters.
- Restructuring of the API interface.
Upon the release of a new version, applications can continue using the old version, allowing the consumer to assess the changes needed. Release notes with all the changes will be provided with every new version, describing all the changes in detail.
Upon upgrading, consumers are encouraged to perform regression testing against the new version before upgrading to the new API version in production.
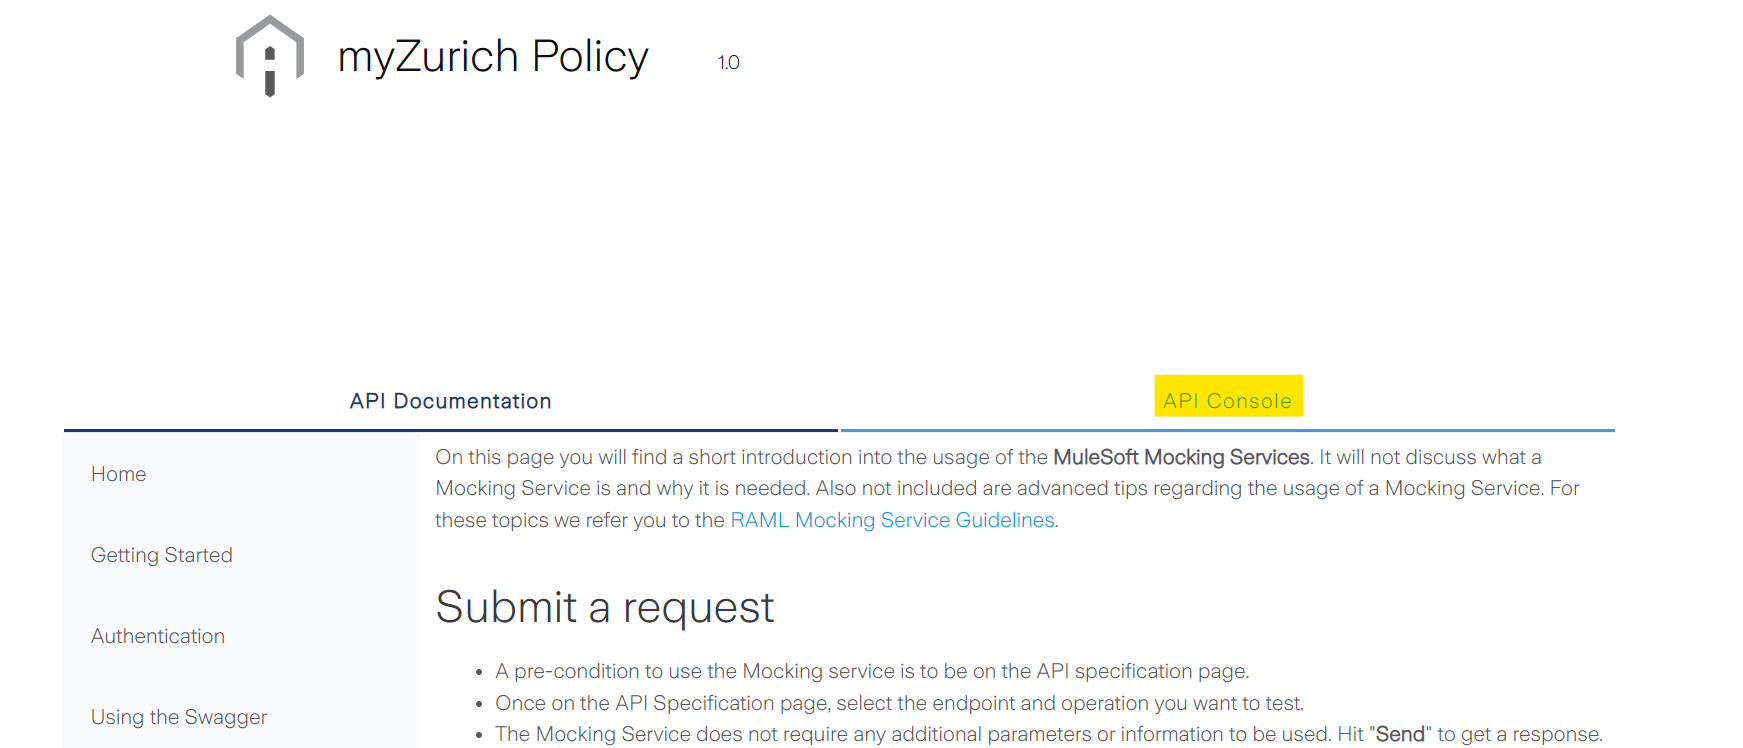
On this page you will find a short introduction into the usage of the Mocking Service in the API Console. The Mocking Service can be used to simulate the usage of the API as well as quickly obtain a sample response.
Submit a request
- To make use of the API Console's Mocking Service, first click on the "API Console" tab:
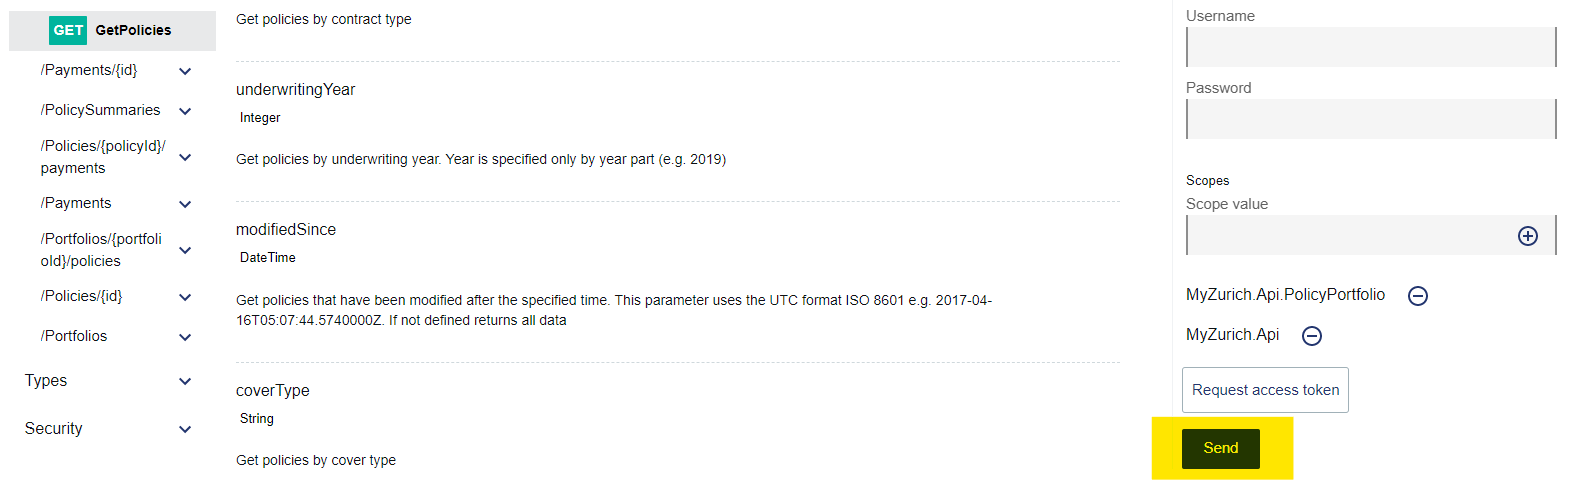
- Once on the API Console page, select the endpoint and operation you want to test. E.g. GET Policies. You will see the mocking service appear on the right hand side:
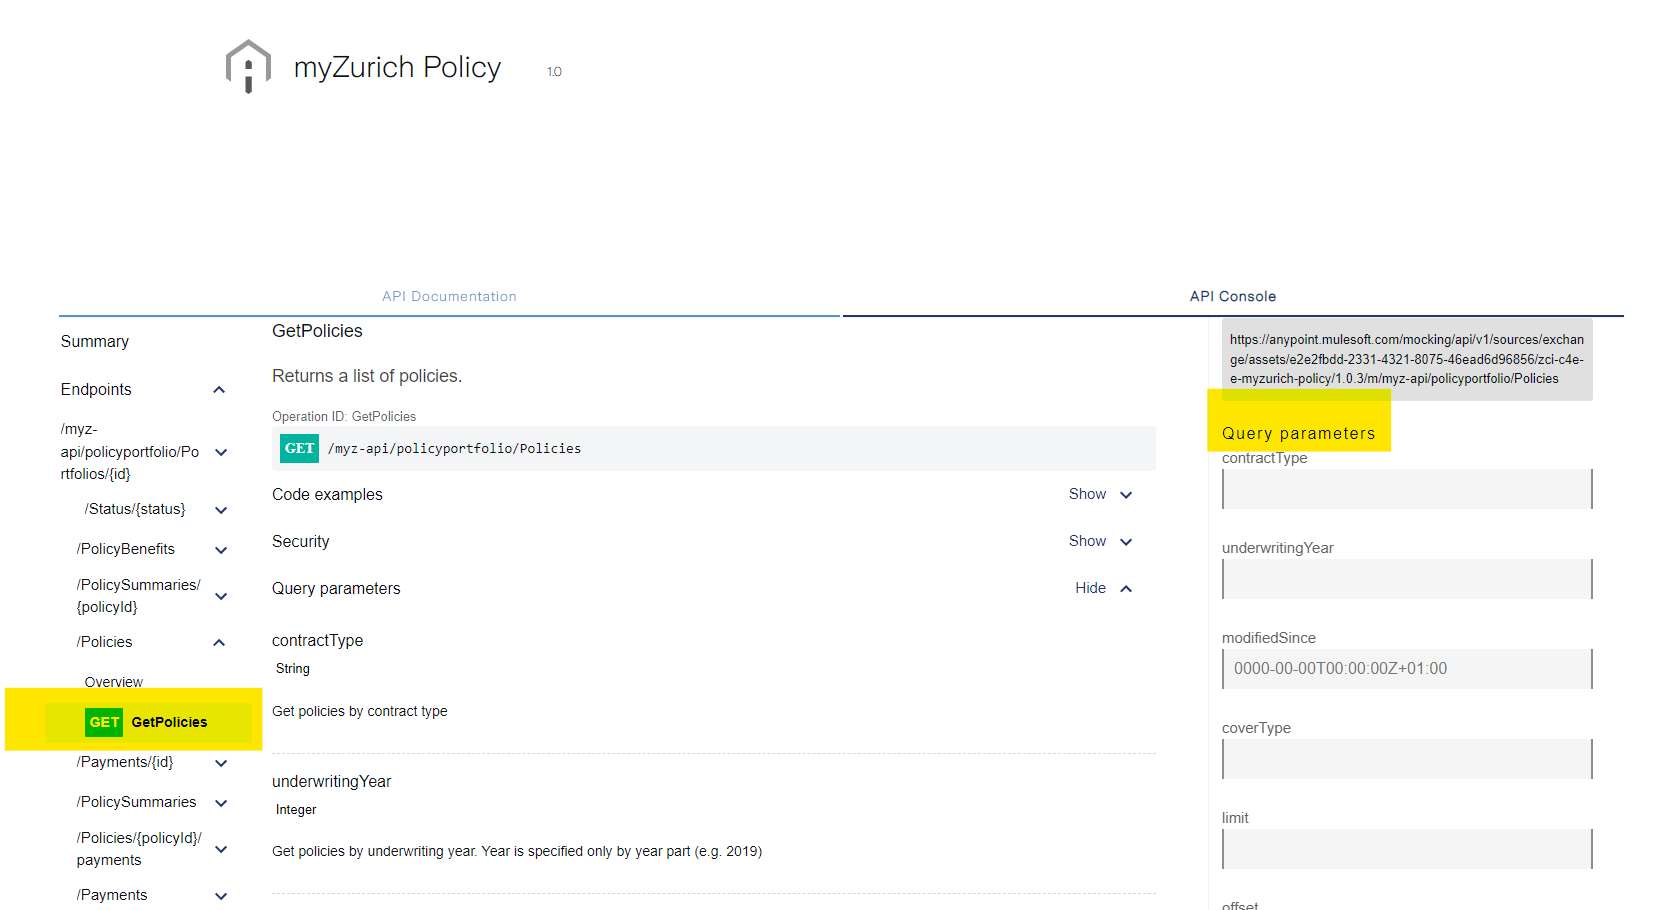
- The Mocking Service does not require any additional parameters or information to be populated. However, feel free to add some parameters as desired. When you're ready, scroll down and hit "Send" to get a response:
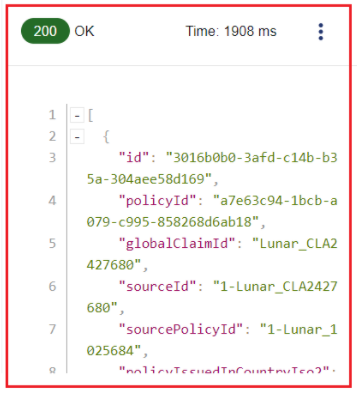
- The response you will get is a pre-defined response with dummy data. Populating/changing any parameters will not affect it:
- Note: In a real-world-scenario, the fields client id and client secret would need to be populated, along with the appropriate subscription key(s). Additionally, you would need to define the scope of your request. The Mocking Service automatically defines the scopes.
General Considerations
- Mocking services will not validate the provided Authentication or return an error.
Exchange Name: zci-c4e-e-myzurich-policy
Authorisation Token URL:
Production: https://www2.myzurich.com/login/connect/token
UAT: https://uat.myzurich.com/login/connect/token
API Request URL:
Production: https://ci-gf-open-api.zurich.com/open/myz-api/policyportfolio
UAT: https://ci-gf-open-api-uat.zurich.com/open/myz-api/policyportfolio